How to Repair a Charging Port on a Laptop: A Comprehensive Guide
Is your laptop's charging port not working? Don't worry, we've got you covered! In this article, we'll show you how to repair a charging port on a laptop, step by step. A faulty charging port can be frustrating, but with the right tools and knowledge, you can fix it yourself and save some money.
Identify the Problem
Before you start repairing your laptop's charging port, make sure to identify the problem. Is the port loose, damaged, or is it not recognizing the cable? Check if the charging port is loose by gently wiggling the charging cable. If it's loose, you might be able to fix it by tightening the screws that hold the port in place.
Tools and Materials Needed
- AA or Roeuing screws
- Glue gun or hot glue stick
- Charging port replacement (optional)
- USB cable and power adapter
- Anti-static wrist strap or mat
- Torx screwdriver (optional)
Step 1: Disconnect the Power Source
Before you start repairing the charging port, make sure to disconnect the power source. This is a precautionary measure to prevent any short circuits or electrical shocks.
Step 2: Remove the Back Panel
Remove the back panel of your laptop to access the charging port. You'll need to remove screws to do this. Some laptops may have a Torx screwdriver required, so make sure you have the correct screwdriver.
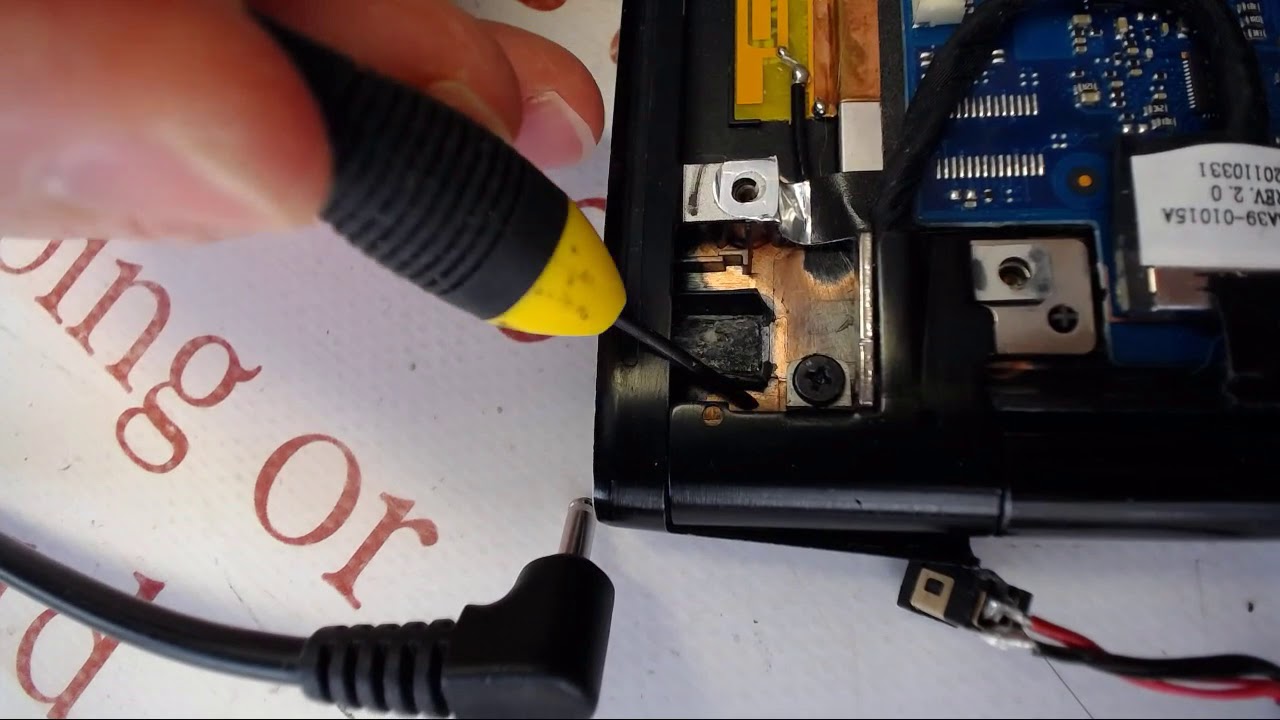
Step 3: Locate the Charging Port
Once you've removed the back panel, locate the charging port. It's usually labeled or marked with a icon of a charger.
Step 4: Remove the Screws Holding the Port
Remove the screws that hold the charging port in place. These screws may be AA, Roeuing, or other types, so make sure you have the correct screwdriver.
Step 5: Gently Pry the Port Loose
Use a plastic spudger or a similar tool to gently pry the charging port loose. Be careful not to damage the surrounding area.
Step 6: Inspect and Repair the Port
Inspect the charging port for any damage or corrosion. If you find any damage, you may need to replace the port. You can use a glue gun or hot glue stick to repair any loose connections.
Step 7: Replace the Charging Port (Optional)
If the charging port is damaged beyond repair, you may need to replace it. You can purchase a replacement charging port online or at a local electronics store.
Step 8: Reassemble the Laptop
Once you've repaired or replaced the charging port, reassemble the laptop in the reverse order that you disassembled it.
Step 9: Test the Charging Port
Test the charging port to make sure it's working properly. Plug in the charging cable and make sure the laptop is charging.
That's it! With these steps, you should be able to repair a charging port on a laptop. Remember to be patient and take your time, as repairing a charging port can be a delicate process. If you're not comfortable repairing the charging port yourself, consider consulting a professional or seeking help from a repair service.
Conclusion
Repairing a charging port on a laptop can be a challenging task, but with the right tools and knowledge, you can fix it yourself. Remember to identify the problem, gather the necessary tools and materials, and follow the steps outlined above. If you're not comfortable repairing the charging port yourself, consider consulting a professional or seeking help from a repair service.
References
For more information on how to repair a charging port on a laptop, check out the following resources:
- Computing and Corporation
- Expert guide to replacing worn USB and power jacks
- Computer charge port repair at uBreakiFix
- Charging Port Replacement Guide
")
")


")


