How to Set Up WiFi on iOS Device: A Step-by-Step Guide
Are you experiencing difficulties connecting your iOS device to a WiFi network? Do you want to learn how to troubleshoot common issues and improve your WiFi speed? In this article, we will guide you through the process of setting up WiFi on your iOS device, including how to connect to an open, secure, public network, and networks you've connected with in the past.Why You'll Love This Tip
Quickly open your iPad and iPhone's WiFi settings to turn on or turn off WiFi. Easily access the WiFi network when you arrive at a friend's house to turn on WiFi on your iPhone or iPad.System Requirements
This tip was performed on an iPhone 17 Pro Max running iOS 26.4.Step 1: Access WiFi Settings
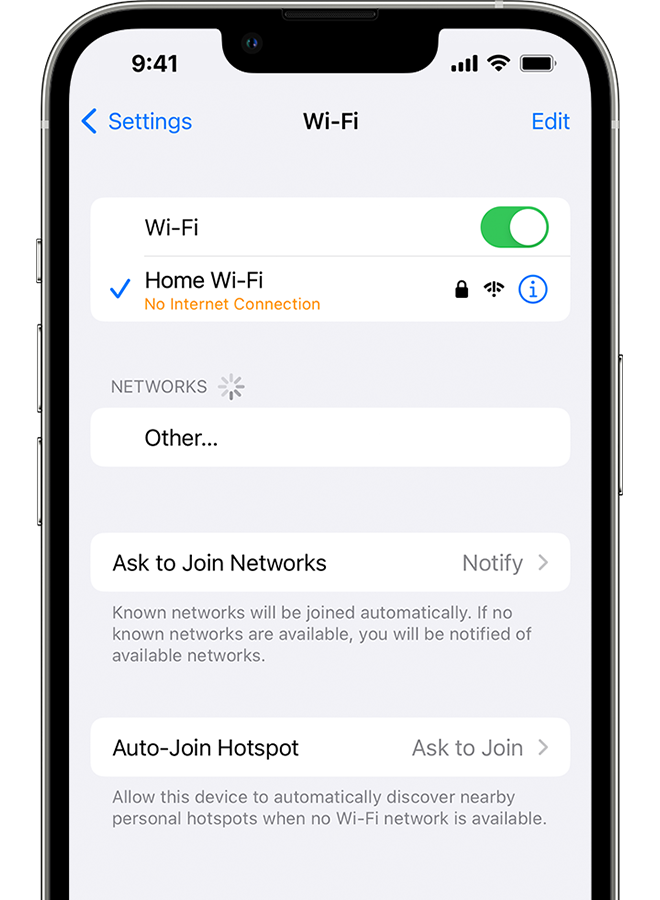
To start, go to the Settings app on your iOS device and select the "Wi-Fi" option. You can also swipe down from the top right corner of your screen to access the Control Center and toggle WiFi on or off.Step 2: Choose a WiFi Network
Under the "Wi-Fi" settings, you'll see a list of available WiFi networks in your area. Select the network you want to connect to from the list. If the network is not available, you can also select the "Other Networks" option to manually enter the network name and password.Step 3: Enter the WiFi Password (If Required)
If the network you select requires a password, you'll be prompted to enter it. Make sure you have the correct password ready to avoid any connectivity issues.Step 4: Confirm Your Connection


")


:max_bytes(150000):strip_icc()/001_connect-echo-dot-to-wifi-5198657-026e7a6b63eb409a88288e6fc621d0a5.jpg "Bluetooth and USB Connection Help - Help Center")
:max_bytes(150000):strip_icc()/004_connecting-android-device-to-wifi-577618-acc16c00df264259a543dc2f6fe89e83.jpg "How do I set up eero? - eero Help Center")