How to Set Up New iPhone on Mac: A Step-by-Step Guide
In today's digital age, setting up a new iPhone on your Mac is an essential task for anyone embracing the Apple ecosystem. This process involves transferring data, configuring settings, and activating your new iPhone. This comprehensive guide will walk you through the entire process of how to set up a new iPhone on your Mac, making it a seamless experience.
Prerequisites
Before you begin, ensure that both your Mac and iPhone are connected to the same Wi-Fi network. Additionally, make sure your Mac is running the latest version of macOS, and your iPhone is running the latest version of iOS.
Step 1: Preparing Your iPhone for Setup
Begin the setup process by turning on your iPhone and choosing your preferred language. Follow the on-screen instructions to select your country or region and Wi-Fi network. Next, tap "Continue" to enable Location Services and agree to the terms and conditions.
- Enable Location Services to allow your iPhone to access your device's location.
- Read and agree to the terms and conditions of Apple's privacy policy.
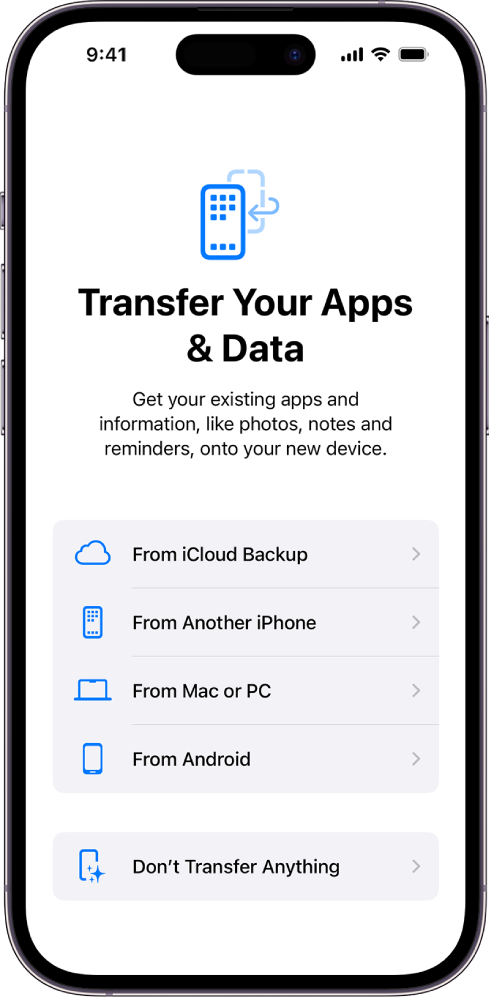
Step 2: Restoring Your iPhone from a Backup
If you have previously backed up your iPhone to iCloud or iTunes, follow the prompts to restore from the backup. This will transfer your data, settings, and apps to your new device.
- Connect your iPhone to the same Wi-Fi network as your Mac.
- Choose the backup you want to restore from iCloud or iTunes.
- Wait for the restore process to complete. This may take several minutes, depending on the amount of data being transferred.
Step 3: Setting Up Your iPhone on Mac
Now that your iPhone is restored, you can set it up on your Mac using the Finder app. Connect your iPhone to your Mac using a USB cable or wirelessly using the "Find my" feature.
- Open the Finder app on your Mac and select "iPhone" from the top navigation bar.
- Select "Set Up" and follow the on-screen instructions to configure your iPhone on your Mac.
Step 4: Transferring Data from iPhone to Mac
Once your iPhone is set up on your Mac, you can transfer data such as contacts, calendar events, and email accounts using the "Migration Assistant" tool.
- Open the Migration Assistant tool on your Mac.
- Connect your iPhone to your Mac using a USB cable or wirelessly using the "Find my" feature.
- Select the data you want to transfer from your iPhone to your Mac and follow the on-screen instructions to complete the transfer.
Final Steps
After completing the setup and data transfer process, follow the on-screen instructions to activate your iPhone, set up Face ID or Touch ID, and complete any additional setup tasks.
- Activate your iPhone by following the on-screen instructions and entering your Apple ID and password.
- Set up Face ID or Touch ID by following the on-screen instructions.
- Complete any additional setup tasks, such as setting up Apple Pay or Apple Health.
Conclusion
Setting up a new iPhone on your Mac is a straightforward process that can be completed in a few steps. By following the steps outlined in this guide, you can transfer data, configure settings, and activate your new iPhone, ensuring a seamless experience in the Apple ecosystem.
Additional Tips
Make sure to regularly sync your iPhone with your Mac to keep your data up to date and ensure that any changes you make on one device are reflected on the other.
Consider enabling iCloud backup on your iPhone to automatically backup your data in case your device is lost or damaged.
We hope this comprehensive guide has helped you understand how to set up a new iPhone on your Mac. If you have any further questions or concerns, please don't hesitate to reach out to us.

:max_bytes(150000):strip_icc()/iphonesetup2-f1c9476a8ba8489b9e4bd4d41db10748.jpg "How to Sync iPhone to Mac: What You Need to Know")


